This blog is powered by Gatsby.js and Netlify. I push changes to this blog’s Github repository and Netlify takes care of the infrastructure and automation of the deployment process. “But Karan”, you wonder, “how would I get to know the outcome of the build process without logging onto Netlify app?” Glad you asked.
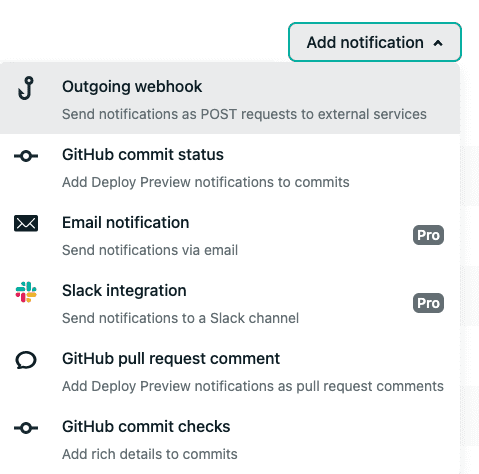
Netlify has a few in-built deploy notification options:
- Github commit status - ✅ or ❌ next to the commit message on Github
- Github pull request comment
- Email notification (Pro)
- Slack integration (Pro)
- Outgoing webhook
The first 2 options still require me to go to Github instead of Netlify. Slack and email are available in the Pro plan only.
Outgoing Webhook 🤙
This option lets us send the build process details to any URL as a POST request. The details are sent in a JSON format.
We’ll be using the outgoing webhook to process the JSON payload and post messages in a Discord channel. The process is fairly straightforward:
- Setup a webhook on a Discord channel
- Sign up for AWS Lambda. The free tier includes 1 million requests per month. This is more than enough for our purpose.
- Publish a serverless function on AWS Lambda
- Add the serverless function as a listener on Netlify deployment notifications
Let’s get started.
Setting up AWS Lambda
You can sign up for AWS Lambda here - AWS Lambda – Serverless Compute - Amazon Web Services
- Create a new user specifically for this use case in AWS Identity and Access Management by following the instructions here.
- Make note of the AWS Access Key ID and AWS Secret Access Key in the step above.
- Download and install aws-cli for your platform.
-
Run
aws configureto authenticate your machine with the AWS services.$ aws configure AWS Access Key ID [None]: AKIAIOSFODNN7EXAMPLE AWS Secret Access Key [None]: wJalrXUtnFEMI/K7MDENG/bPxRfiCYEXAMPLEKEY Default region name [None]: us-east-1 Default output format [None]: ENTER
Setting up webhook in a Discord channel
If you already have a server on Discord, I would suggest creating a new channel just for these notifications.
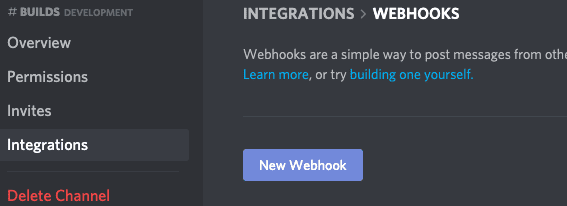
- Right-click on the channel and click “Edit Settings”.
- Go to the “Integrations” tab.

- Click on “New Webhook”.
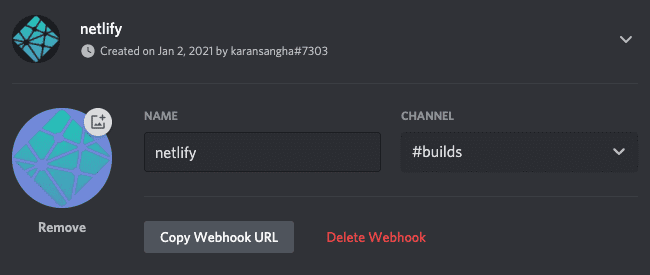
- Set the name and icon as per your choice.

- Copy the webhook URL.
Publishing a serverless function on AWS Lambda
-
Clone Zac’s webhook consumer for Discord available on Github.
$ git clone https://github.com/zandoh/netlify-discord-webhook-consumer.git $ cd netlify-discord-webhook-consumer - Run
yarnto install the related dependencies. - Edit
serverless.example.ymlwith the webhook URL from the previous section. I would highly recommend adding a webhook secret. You can use any key generator to create a secure secret. - Rename
serverless.example.ymltoserverless.env.yml. - Run
yarn deployto compile and upload this serverless function on AWS Lambda. - Copy the URL from the terminal. It’ll look something like
https://coolservername.execute-api.us-east-1.amazonaws.com/dev/webhook.
Almost done.
Setting up Netlify’s outgoing webhook notification service
- Go to your Netfliy site’s “Build & Deploy” section and scroll down to “Deploy notifications”
- Add a new “Outgoing webhook” notification.

- Choose “Deploy started” as the event to listen for and add the URL copied from the terminal in the “URL to notify” field. The JWS secret token is the webhook secret entered in the
serverless.env.yml. - Repeat this process for the following events: “Deploy succeeded” and “Deploy failed”.
Done.
Testing.. testing.. 123.. 123..
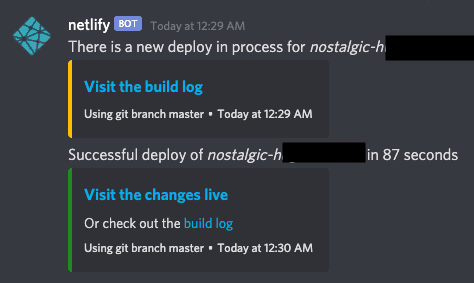
In order to test this you can either manually trigger a deploy of your Netlify site or push a new change from Github. Either way, we’ll see the following set of messages on Discord:

Hope you found this tutorial easy to follow. If you know an alternate or an easier way of accomplishing this, please let me know! 😁